

The Ultimate Guide: How to Make a Super Saiyan Wig
Are you a Dragon Ball fan looking to take your cosplay game to the next level? Or maybe you just want to have some fun and channel your inner Super Saiyan. Whatever the reason, creating a Super Saiyan wig can be a challenging but rewarding project. In this ultimate guide, we will walk you through the step-by-step process of making your very own Super Saiyan wig.
Materials You'll Need
Before we dive into the process, let's make sure you have all the necessary materials:
- A bald cap
- Yellow or blonde synthetic hair extensions
- Clips or bobby pins
- Scissors
- Thread and needle
- Elastic band or wig cap
- Hairspray
- Styling gel or glue
- Hair dryer or flat iron (optional)
Step 1: Prepare the Bald Cap
Start by putting on the bald cap. Make sure it fits snugly on your head and covers all of your natural hair. Use clips or bobby pins to secure the cap in place if needed.
Step 2: Attach the Hair Extensions
Take the yellow or blonde synthetic hair extensions and cut them into shorter lengths. The length will depend on your preference and the style of Super Saiyan you want to emulate. Generally, Super Saiyan wigs have spiky and wild hair, so shorter lengths work best.
Using a thread and needle, sew the hair extensions onto the bald cap. Start from the back and work your way to the front, following the natural direction of the hair growth. Make sure to leave some space at the front for the iconic Super Saiyan bangs.
Step 3: Style the Wig
Now that the hair extensions are securely attached, it's time to style the wig. Comb through the hair to detangle any knots and make it easier to work with.
If you prefer a more natural-looking Super Saiyan wig, you can use a hairdryer or flat iron to straighten the hair slightly. This step is optional, as Super Saiyan hair is known for its wild and spikey appearance.
Next, use styling gel or glue to create the signature spikes. Apply a small amount of product to your fingers and work it through small sections of the hair, pulling upwards to create spikes. Repeat this process until all of the hair is styled to your liking.
Step 4: Secure the Wig
Once you're happy with the style, it's important to secure the wig in place. You can either use an elastic band to hold the wig securely onto your head or use a wig cap for added stability.
Using bobby pins, secure the wig cap or elastic band to the bald cap, making sure everything feels secure and comfortable. Adjust the wig as needed to achieve the desired look.
Step 5: Final Touches
The final step is to add some finishing touches to your Super Saiyan wig. Use hairspray to set the style and keep everything in place. This will also add some shine and texture to the wig, making it look more realistic.
Once the hairspray is dry, you can further customize your wig by adding any additional accessories or details that are specific to the Super Saiyan character you're portraying. This could include headbands, hair ornaments, or even color enhancements.
Conclusion
And there you have it – your very own Super Saiyan wig! Whether you're cosplaying at an event or simply having fun at home, this wig will surely make you feel like a true Saiyan warrior.
Remember, if you're in need of Dragon Ball merchandise, including Super Saiyan wigs and other cosplay accessories, be sure to visit our store DBZ Store. We have a wide range of high-quality products to help you complete your Dragon Ball transformation.
Best Sellers
-

 Original price $37.98 - Original price $37.98Original price$37.98$37.98 - $37.98Current price $37.98
Dragon Ball Z - Vegeta Badman Shirt
In stockVegeta the Prince of Saiyans wearing a pink shirt? How is it possible? Bulma is really cheeky! Anyway, unlike a combat outfit, this Vegeta Badman S...
View full detailsOriginal price $37.98 - Original price $37.98Original price$37.98$37.98 - $37.98Current price $37.98 -

 Original price $36.99 - Original price $36.99Original price$36.99$36.99 - $36.99Current price $36.99
Sleek Goku Mousepad Dragon Ball Z
In stockAbout Elevate your gaming or work setup with the "Sleek Goku Mousepad Dragon Ball Z." This stylish mousepad features a captivating design showcas...
View full detailsOriginal price $36.99 - Original price $36.99Original price$36.99$36.99 - $36.99Current price $36.99 -
 Original price $5.00 - Original price $20.99Original price $5.00$15.99 - $27.99$15.99 - $27.99Current price $15.99
Dragon Ball Z Hot Anime Art Silk Poster Canvas Print
In stockAbout Transform your space into an epic battleground with the "Dragon Ball Z Hot Anime Art Silk Poster Canvas Print." This stunning artwork capture...
View full detailsOriginal price $5.00 - Original price $20.99Original price $5.00$15.99 - $27.99$15.99 - $27.99Current price $15.99 -
 Original price $74.99 - Original price $74.99Original price $74.99$74.99$74.99 - $74.99Current price $74.99
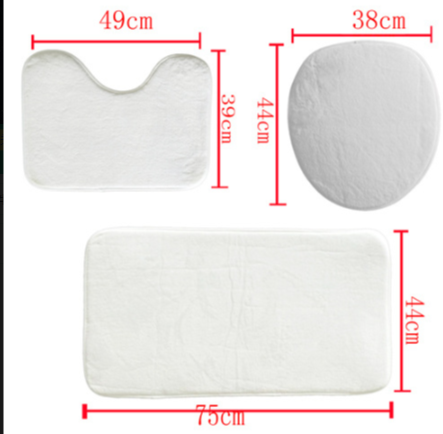
Dragon Ball Super Caulifla Super Saiyan 2 Epic Casual Four-piece Bathroom
Introducing the Dragon Ball Super Caulifla Super Saiyan 2 Epic Casual Four-piece Bathroom Set – a fusion of style and Saiyan strength for your bath...
View full detailsOriginal price $74.99 - Original price $74.99Original price $74.99$74.99$74.99 - $74.99Current price $74.99 -
 Original price $35.99 - Original price $35.99Original price $35.99$35.99$35.99 - $35.99Current price $35.99
Bulma Dress: Your Versatile Wardrobe Game-Changer
Embark on an adventure of style and comfort with our Bulma Dress – the ultimate everyday casual wear that effortlessly transforms into the most cre...
View full detailsOriginal price $35.99 - Original price $35.99Original price $35.99$35.99$35.99 - $35.99Current price $35.99


Leave a comment